Leaking Basement Behind Support Agains Foundation
The Dos and Don'ts of Waterproofing Basement Walls
Troubleshoot the causes and observe the solutions to wet basement walls – the sooner, the improve, to maintain the integrity of your home.

Photograph: istockphoto.com
Because they're built below grade, basements tend to accept on water. You may discover moist basement walls from time to fourth dimension, water puddles here and in that location, or—worst example scenario—flooding during the rainy flavour. Humid, clammy, or downright wet basements can result in peeling paint, mold and mildew growth, rotted wood, and damage to stored items.
While builders have steps to waterproof basements during structure, over time a business firm can settle, creating cracks in the basement walls. When the soil outside becomes saturated, water can seep through these cracks. Even structurally sound basement walls can absorb h2o from the soil and transfer information technology to the basement interior, making the walls feel wet. Equally the water from the walls evaporates, the air in the basement becomes more than humid. A loftier-quality dehumidifier will help remove backlog basement humidity, just the best long-term solution is to waterproof the walls.
RELATED: So, You Want to… Waterproof Your Basement
Depending on the reason for the moisture problem, the fix could be a simple do-information technology-yourself remedy, or it could crave the assistance of a foundation contractor. If y'all're looking at waterproofing basement walls, the following tips will get y'all started on the correct foot.
Observe basement waterproofing pros
Get gratis, no-delivery estimates from pros near you.
![]()
![]()
DO determine the source of the h2o.
Because concrete is porous, you can oftentimes run into wet streaks that let you know where the h2o is coming in. Look for streaks along cracks, at the corners of windows, between mortar joints (for cement block walls), and effectually pipes where they enter or exit, such every bit a water-supply line or a sewer piping.
If entire wall surfaces are wet, however, you'll demand to practise further sleuthing. To deport a simple condensation test, dry out an area of the wall with a rag and then attach a i-pes foursquare piece of aluminum foil to the wall with duct tape. Peel off the foil afterwards 24 hours and check how the underside of the foil feels. If information technology is wet, water is seeping through the wall from the exterior. If dry, the moisture is originating elsewhere in the basement, well-nigh likely from a basement shower—easily remedied past installing a vent fan in the bathroom to direct steam outdoors.
DON'T make wall repairs with standing water in the basement.
During a rainy season, a crevice in a basement wall can allow an inch or two of h2o in, but before you seek to repair the fissure, remove all the water from the floor. Working in a flooding basement increases the risk of electrical stupor or electrocution. Turn off the power to the basement, and so apply a utility pump (with extension cords that reaches an upstairs outlet) to go rid of the h2o. The pump will discharge the water to the surface of your yard via a garden hose. When the basement is h2o-complimentary, proceed with inspecting, fixing, and effectively waterproofing the basement walls.
Practice fill up cracks with hydraulic cement.
Some other area where cracks are unremarkably establish is at the bottom of the basement walls. When a foundation is poured, its footing—a broad flat base of operations made from physical and reinforced steel, designed to support the walls—is poured get-go, and then the walls are poured on summit after footings harden. Although this is standard construction procedure, it tin can create what's known equally a "cold joint," a weak spot in the foundation between the wall and the footing where cracks can develop with the shifting and settling of a foundation, along with lateral pressure from the soil.
Fortunately, sealing cracks is a relatively simple DIY task that involves filling them with hydraulic cement, such as QUIKRETE'south Hydraulic Water-End Cement (available from Home Depot). Hydraulic cement—which contains additives that cause the cement to aggrandize and set rapidly—is mixed with water to a heavy putty consistency and and so pressed into cracks with gloved fingers or with a putty knife (follow mixing and application directions). As hydraulic cement expands, it pushes deep into cracks and crevices to course a watertight bail. Mix only every bit much as y'all can utilise inside three minutes, though, considering that's how chop-chop it begins to set.
DON'T forget to address window well leaks.
Window wells are a mutual source of basement wall leaks considering they tend to retain h2o if a proper drainage system wasn't installed beneath the well when the firm was built. This tin can lead to water pooling effectually the lesser of a basement window and and so seeping in.
While information technology's difficult to install a window well drainage system afterward the fact, consider digging approximately two feet lower in the well expanse, and then filling the space with gravel to help rainwater disperse rather than collect in the window well. And so, caulk around the window with a caulk suitable for use on masonry, such as GE's 100 Percentage Silicone Window and Door Caulk (available from Home Depot). In addition, install a sloped window well embrace, such as Shape Production's Universal Fit Polycarbonate Window Well Cover (available from Home Depot), over the window well to direct rainwater away.
DO utilise a masonry waterproofing product to blank interior basement walls.
If your foil test showed that water is soaking through your basement walls and leaving them wet, seal the interior of the walls with a high-quality waterproof paint, such as DRYLOK White Extreme Waterproofer (available from Dwelling house Depot). This type of sealant comes premixed and goes on just like a coat of paint. When waterproofing basement walls with it, brush or gyre the paint on thickly enough to fill all the little surface holes, then allow information technology to dry out fully before a second coat is applied. When completely dry out, the sealant forms a watertight bond to continue any more moisture from seeping through. A five-gallon container treats approximately 500 square anxiety of wall.
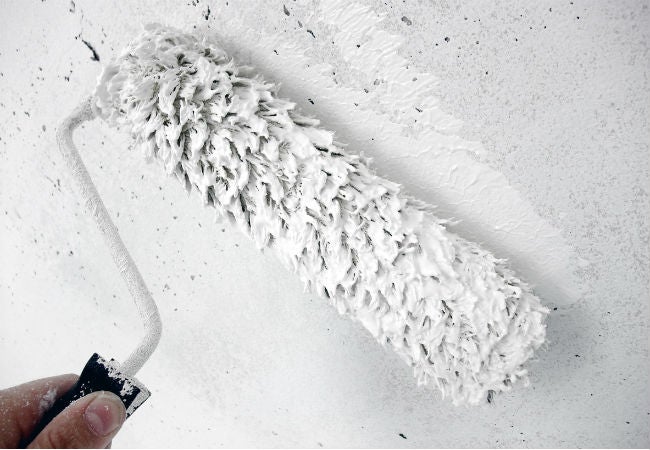
Photo: istockphoto.com
DON'T use sealer over painted walls or efflorescence.
If you lot or a previous possessor painted the basement walls, y'all'll have to remove the paint before applying sealer, which only adheres well to bare masonry. It'due south common to discover several coats of paint in older homes, which is all-time removed with a sandblaster by pros known as blasting contractors. Alternately, information technology can exist removed by wire brushing, a ho-hum just cheap DIY job.
Information technology's also necessary to remove efflorescence—white deposits that form on the surface of concrete walls subject field to constant moisture—before applying sealer; do so with muriatic acid (follow the manufacturer's instructions).
RELATED: seven Wellness Hazards Lurking in Your Basement
Exercise accept steps to keep water away from your basement.
Sometimes, the solution to wet basement walls is piece of cake. For instance, remove foundation plantings, such as bushes and flowerbeds that crave watering, which subsequently allows water to seep into the basement. Also inspect and, if needed, repair guttering and downspouts to ensure that they're directing h2o away from your dwelling house. Information technology'south also a good idea to grade your yard away from the foundation—at least a two percent gradient.
In addition to the to a higher place steps, consider having an exterior drain tile system installed. This is usually a last-ditch endeavour because it's pricey, hands running $10,000 or more. Information technology requires excavating the soil from around the exterior of your basement in order to install a perforated drain at the footing level. A waterproof membrane is often installed on the outside of the basement wall, and the system likewise requires putting in a buried sump pump where water will collect then be pumped to the surface. This is strictly a job for a foundation contractor, but information technology could greatly reduce basement water bug.
DON'T forget interior drainage solutions.
Another method of attaining dry basement walls is to install a drainage channel beneath the floor inside the basement. The drain is similar to the outside drain tile described above, just it's located just within the basement walls; then, new walls are built on the inside of bleed so the original basement walls are not visible. This is another job for a foundation contractor, at a minimum cost of around $v,000. When it's done, you'll have new, dry walls, and any residual water that seeps through the old basement walls will be directed to the bleed channel and pumped away.
Detect basement waterproofing pros
Get complimentary, no-commitment estimates from pros near you.
![]()
![]()
Source: https://www.bobvila.com/articles/tips-for-waterproofing-basement-walls/
0 Response to "Leaking Basement Behind Support Agains Foundation"
Post a Comment